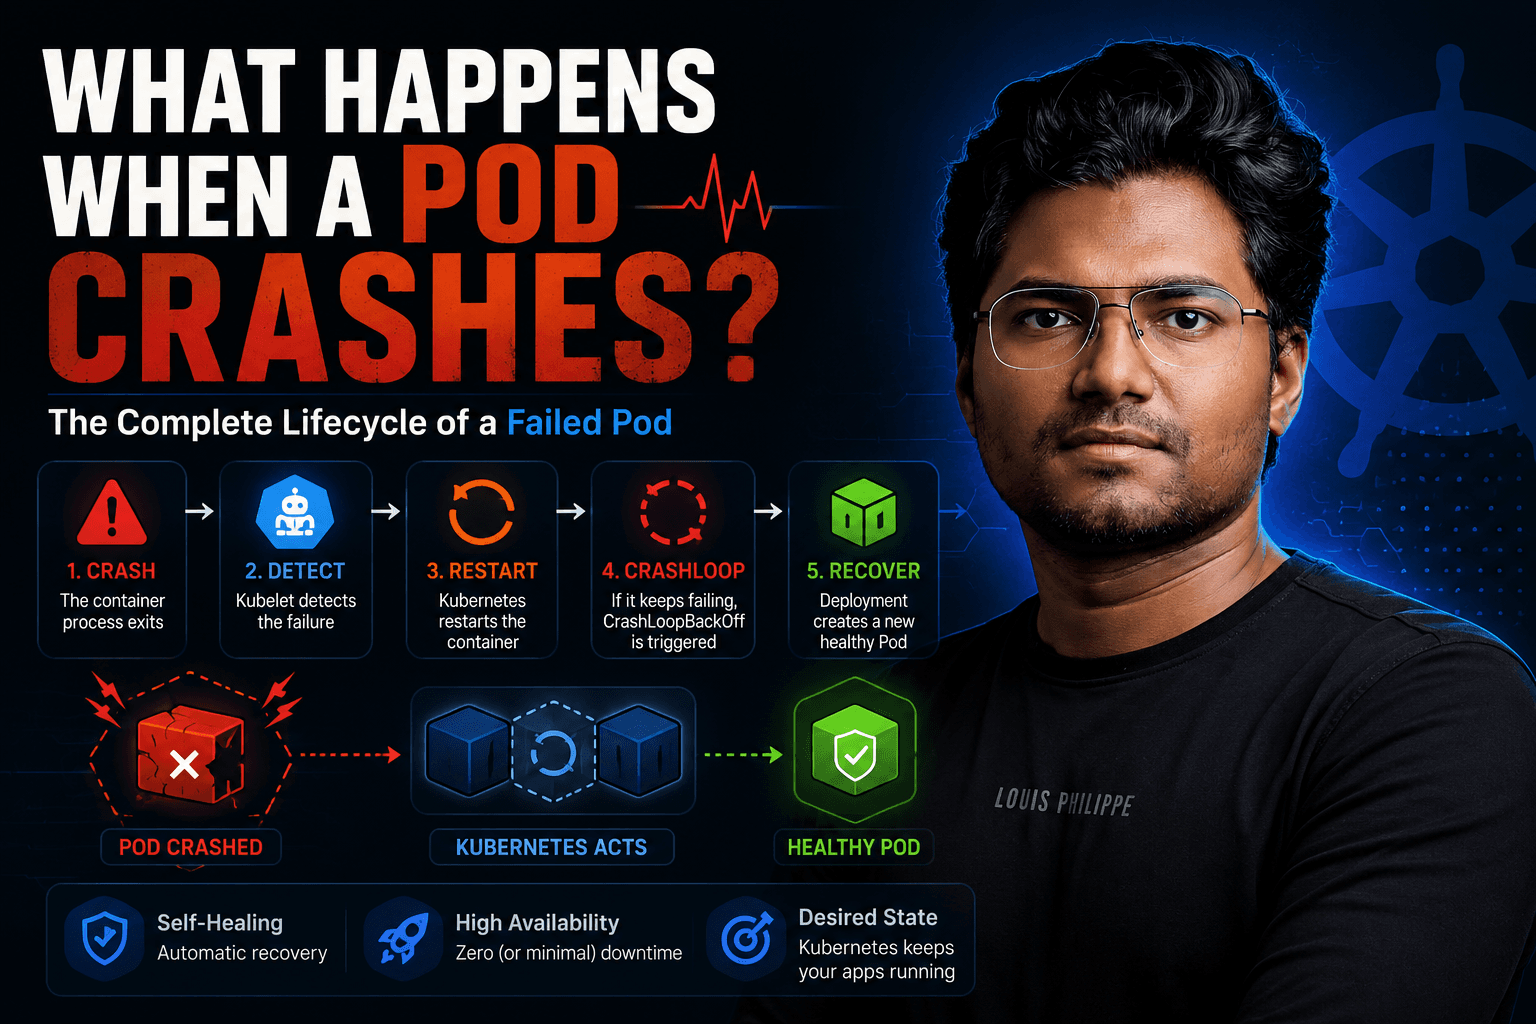
What Happens When a Pod Crashes?
Most developers know that Kubernetes can automatically restart failed applications. But have you ever wondered what actually happens behind the scenes when a Pod crashes?
When I first started learning Kubernetes, I assumed that if an application failed, Kubernetes would somehow magically fix everything. The reality is much more interesting.
Understanding what happens during a Pod failure is one of the most important concepts for Kubernetes developers, operators, and certification candidates.
Let’s break it down step by step.
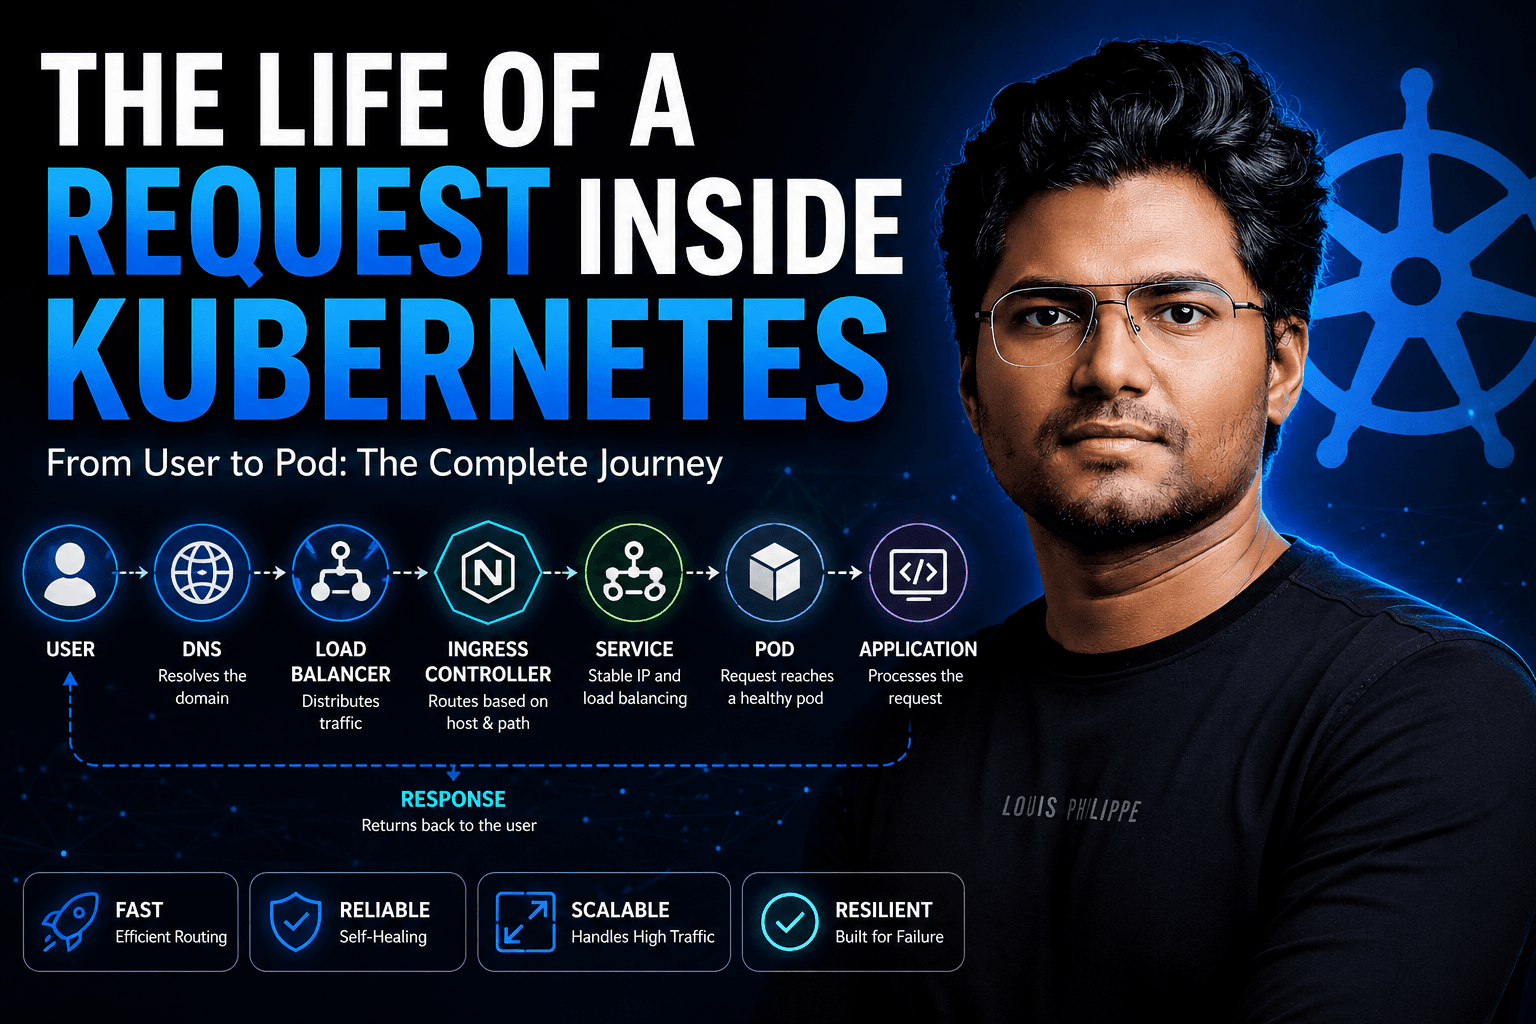
The Life of a Running Pod
Imagine you have deployed a simple application:
apiVersion: apps/v1
kind: Deployment
metadata:
  name: web-app
spec:
  replicas: 3
  selector:
    matchLabels:
      app: web-app
  template:
    metadata:
      labels:
        app: web-app
    spec:
      containers:
      - name: web-app
        image: nginx
This Deployment creates three Pods.
Users send requests to the application, and everything works normally.
Then suddenly, one of the Pods crashes.
What happens next?
Step 1: The Container Process Exits
Every container has a main process.
For example:
Nginx runs the nginx process
Java applications run the JVM
Node.js applications run node
Python applications run python
If this process exits unexpectedly, Kubernetes considers the container unhealthy.
Common reasons include:
Application bugs
Out of memory errors
Unhandled exceptions
Misconfigurations
Failed startup logic
At this point, the container stops running.
Step 2: The Kubelet Detects the Failure
Every Kubernetes node runs an agent called the Kubelet.
The Kubelet continuously monitors all Pods running on its node.
When the container exits, the Kubelet immediately notices the state change.
The Pod status changes from:
Running
to:
Error
or
CrashLoopBackOff
depending on the situation.
The Kubelet now decides what action to take based on the Pod’s restart policy.
Step 3: Kubernetes Attempts a Restart
Most workloads use the default restart policy:
restartPolicy: Always
This means Kubernetes will automatically restart the failed container.
The container runtime:
containerd
CRI-O
Docker (older environments)
creates a fresh container instance.
The application starts again.
If the issue was temporary, users may never notice anything happened.
Step 4: What If the Application Keeps Crashing?
Sometimes the application crashes immediately after startup.
Example:
Container Started
Application Error
Container Exited
Kubernetes tries again.
Container Started
Application Error
Container Exited
Again.
Container Started
Application Error
Container Exited
Again.
This creates a restart loop.
To prevent endless rapid restarts, Kubernetes introduces a backoff delay.
This is known as:
CrashLoopBackOff
You might see:
kubectl get pods
Output:
NAME                     READY   STATUS             RESTARTS
web-app-abc123           0/1     CrashLoopBackOff   8
This is Kubernetes telling you:
“I keep restarting this container, but it keeps failing.”
Step 5: Deployment Notices the Problem
Now let’s look at the bigger picture.
Remember:
replicas: 3
The Deployment wants three healthy Pods.
If one Pod becomes permanently unhealthy, the Deployment controller begins reconciliation.
Kubernetes constantly compares:
Desired State
with
Actual State
If they don’t match, Kubernetes takes action.
This is one of the core principles behind Kubernetes.
Step 6: Kubernetes Creates a Replacement Pod
Suppose a node crashes completely.
The Pod disappears.
The Deployment notices:
Desired Pods: 3
Actual Pods: 2
Kubernetes immediately schedules a replacement Pod on another available node.
Users continue accessing the application while Kubernetes restores the desired state.
This self-healing capability is one of the biggest reasons Kubernetes became the standard platform for modern applications.
Understanding CrashLoopBackOff
Many beginners think CrashLoopBackOff is the problem.
It’s not.
CrashLoopBackOff is actually a symptom.
The real issue is usually one of the following:
Application Bug
Unhandled Exception
Segmentation Fault
Runtime Error
Missing Configuration
Database URL missing
API key missing
Environment variable missing
Failed Dependencies
Database unavailable
External API unreachable
Message queue unavailable
Resource Limits
Out Of Memory
CPU starvation
The first thing you should do is inspect the logs.
kubectl logs pod-name
For previously crashed containers:
kubectl logs pod-name --previous
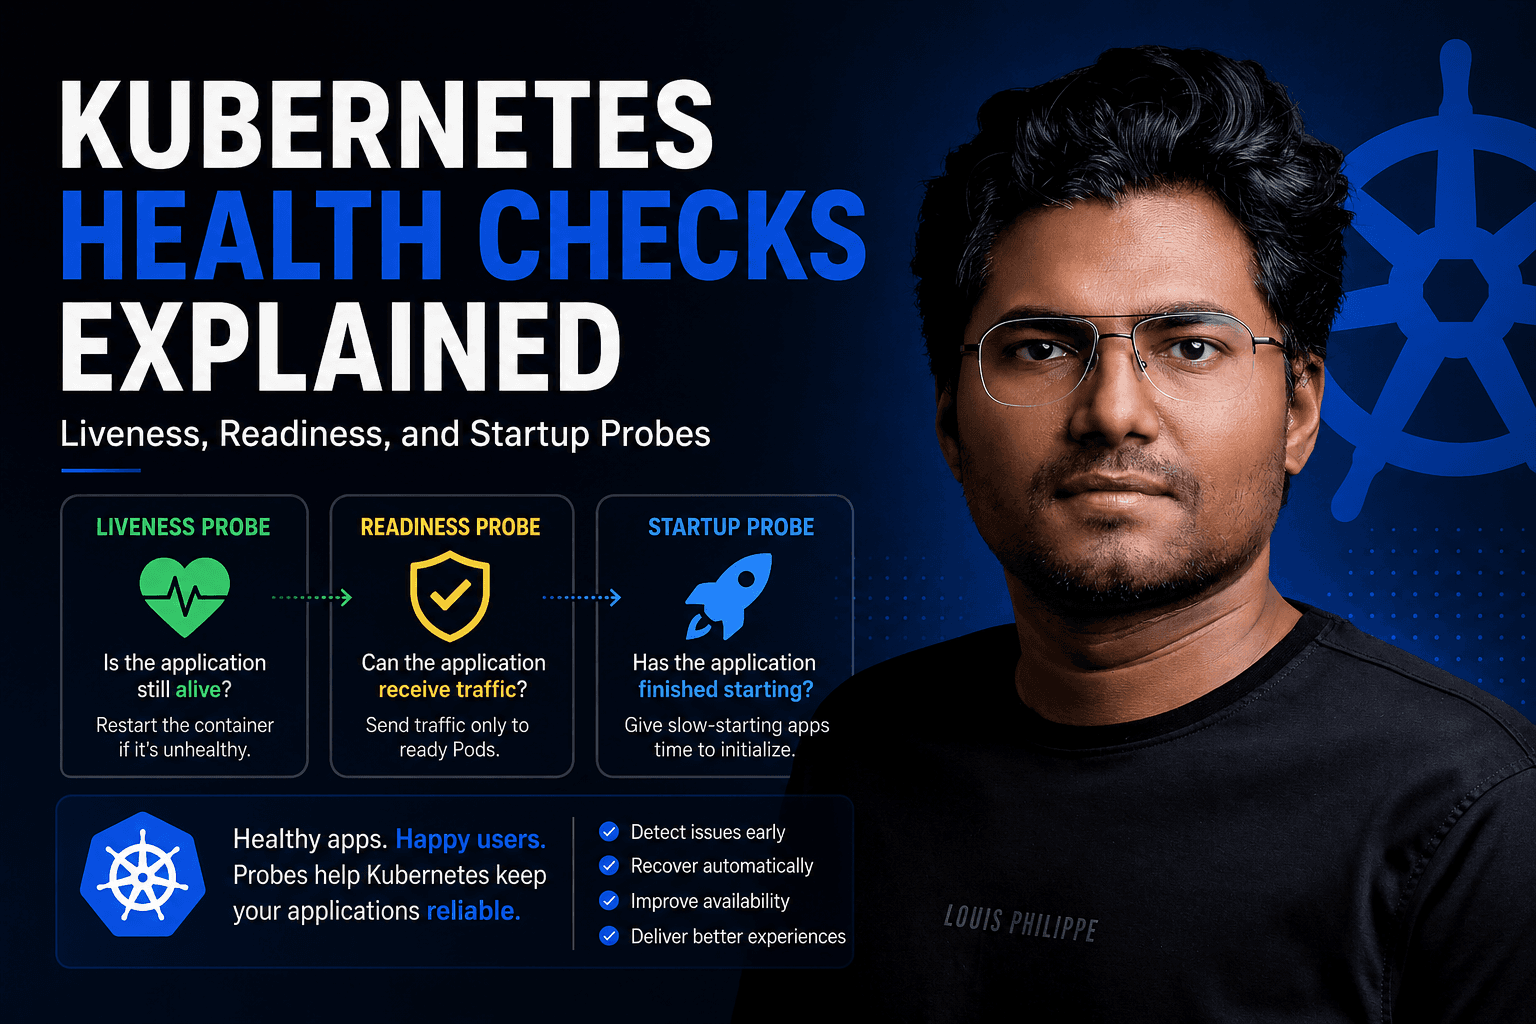
How Readiness and Liveness Probes Help
Kubernetes doesn’t just wait for containers to crash.
It can proactively monitor application health.
Liveness Probe
Checks:
Is the application still alive?
If the probe fails repeatedly:
Container Restarted
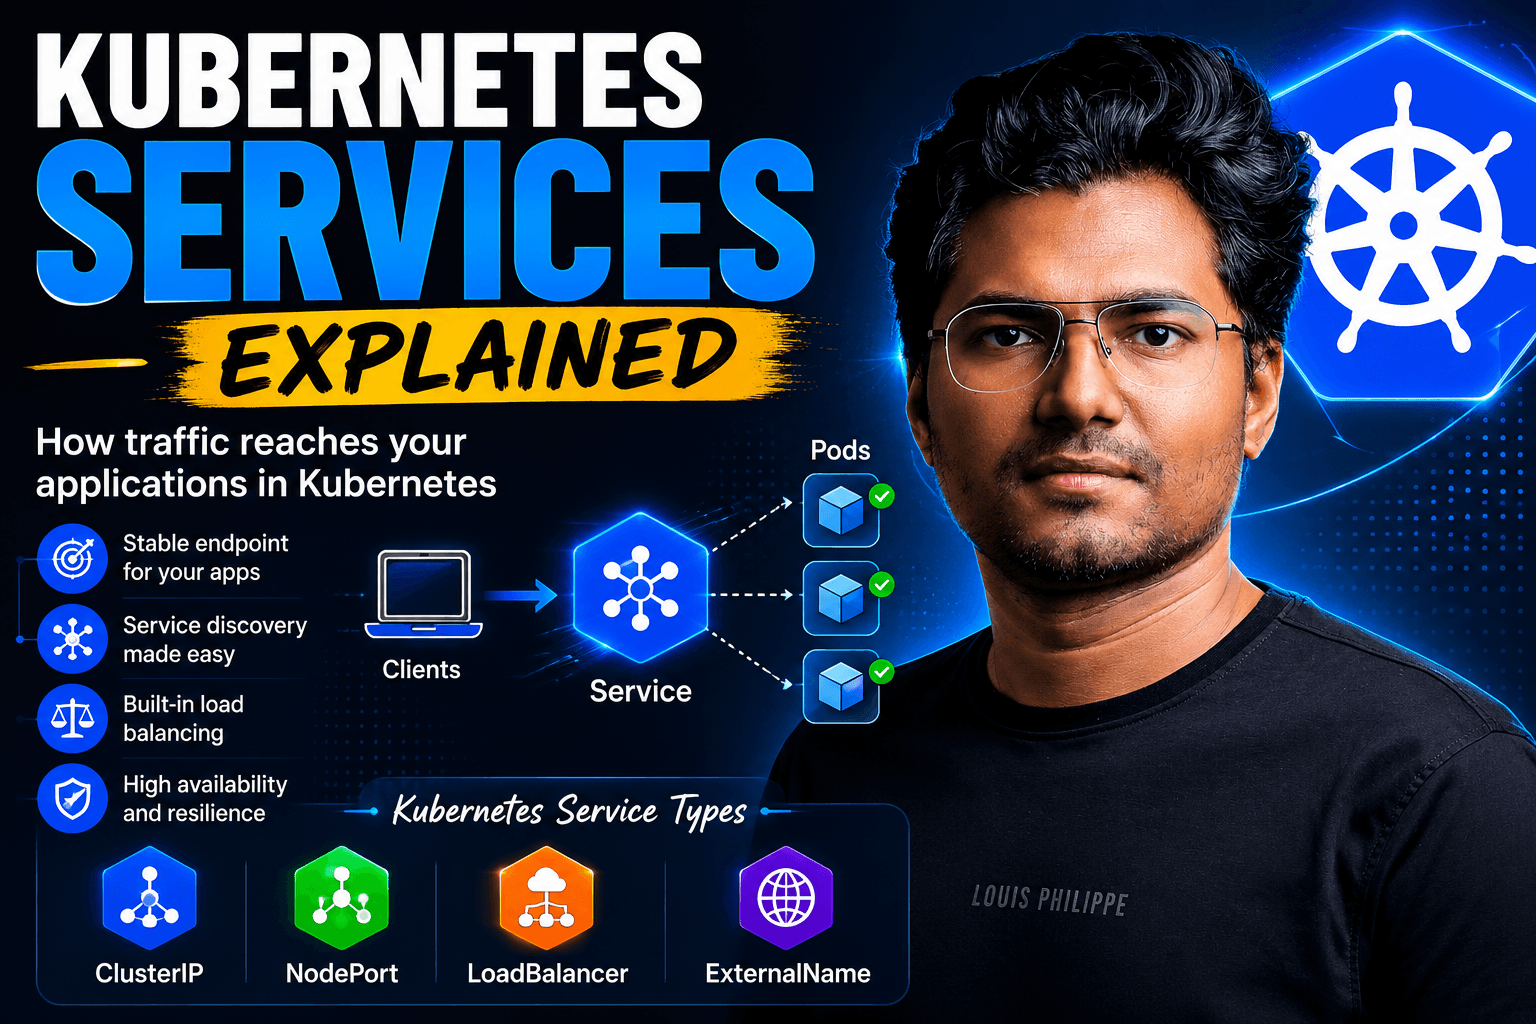
Readiness Probe
Checks:
Can the application serve traffic?
If the probe fails:
Pod Removed From Service Endpoints
Traffic stops flowing to that Pod until it becomes healthy again.
This prevents users from hitting unhealthy applications.
A Real Production Scenario
Imagine an e-commerce application.
One Pod develops a memory leak.
Memory usage increases until the process crashes.
Kubernetes detects the failure.
The container restarts.
The Service automatically routes traffic to healthy Pods.
Users continue shopping.
A replacement Pod becomes available.
The platform heals itself.
Without Kubernetes, an engineer might need to wake up at 2 AM and manually restart the application.
With Kubernetes, most failures are handled automatically.
Key Lessons
When a Pod crashes, Kubernetes follows a predictable process:
Container process exits
Kubelet detects the failure
Kubernetes attempts a restart
CrashLoopBackOff appears if failures continue
Deployment compares desired state with actual state
Replacement Pods are created if needed
Services continue routing traffic to healthy Pods
This entire workflow happens automatically and often within seconds.
That’s the power of Kubernetes.
It isn’t just a container orchestration platform.
It’s a self-healing system designed to keep applications running even when individual components fail.
The next time you see a Pod enter CrashLoopBackOff, don’t panic.
Instead, remember that Kubernetes is already doing its job — the real task is finding out why the application keeps crashing.
Final Thoughts
One of the biggest lessons I learned while working with Kubernetes is that failures are expected.
Containers crash.
Nodes fail.
Applications encounter bugs.
Kubernetes was designed with this reality in mind.
Rather than trying to prevent every failure, Kubernetes focuses on detecting problems quickly, recovering automatically, and maintaining the desired state of the system.
Understanding what happens when a Pod crashes helps you move beyond simply deploying applications and start thinking like a Kubernetes operator.
The next time you see a Pod restart or enter a CrashLoopBackOff state, you’ll know exactly what’s happening behind the scenes — and more importantly, where to begin troubleshooting.
That’s one of the key skills that separates Kubernetes beginners from engineers who can confidently run production workloads.
Connect With Me
If you’re preparing for Kubernetes certifications, pursuing the Kubestronaut journey, or working in the cloud-native ecosystem, I’d love to connect.
Follow me for more articles on Kubernetes, CNCF certifications, DevOps, Platform Engineering, and Cloud-Native technologies.
LinkedIn: https://www.linkedin.com/in/shahzadaliahmad/
LFX Profile: https://openprofile.dev/profile/shahzadahmad91
Credly: https://www.credly.com/users/shahzadahmad
Website: https://shahzadahmad.dev/
If you found this article helpful, consider sharing it with others in the Kubernetes community.